What's been happening in my Monster High family of late? There have been several new additions to the group (we're up to 10 now!), I can't wait to take a new family photo. With my birthday and Christmas approaching fast I think the numbers may increase further still.
I've been doing a little sewing for them. To the left, Frankie models my first try at a dress. I plan on opening an Etsy store for Blythe clothing and am toying with the idea of including some Monster High offerings aswell. Well, it won't happen 'till the new year anyway.
Below, meet Frankie's new sister, Shelley. Named after Mary Shelley, the author of Frankenstein. Also suitable, I thought, as she is a Gloom Beach version. Just love the sea green make-up and her different hand sculpt.
In all honesty the non-stndard hands were the selling point for me, but a nice surprise was her hair! While School's Out Frankie has more black on top with a solid white underside, Gloom Beach Frankie has more white on top with a black underneath.
The girls have been converted to Deadfast fandom by Ghoulia. Teeheheh. Seriously tho, it was the only top I had two of. Made me notice that the tops are actually different in a few small ways.
A last small note, I love how close the poll is! Seems all the girls have a lot of love, nice to see.
Coming up in future posts you can expect to meet more of my new girls, get more hair styling tips and preview some freaky handmade fashions.
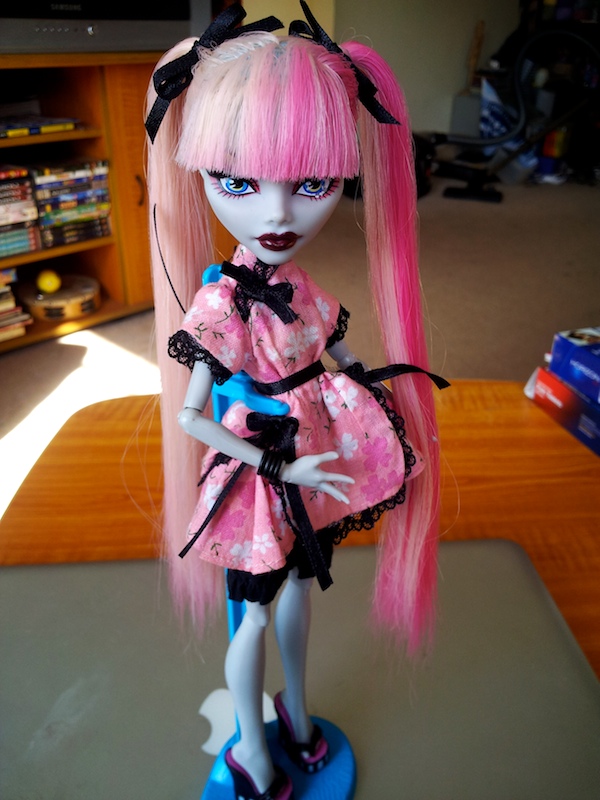
All my other MH ghouls just pale in comparison. Sorry girls. This is my favourite Monster High picture that I've taken so far.
For those who haven't met Lilith yet, she is a Ghoulia Yelps Dawn of the Dance version. I rerooted her with thermal saran, as seen in my reroot tutorial.
This second picture is a perfect demonstration of the thermal saran in action. When I opened my curtains thismorning she was standing half in the sun, half in the shade. Did I mention I adore her? ^_^
I finally managed to find her and she is a welcome addition to this small, but fast growing, family. Her outfit is lovely, no complaints or defects on this one! Of course I adore her transparency, I don't think I can bring myself to put shoes on her. Hahah. She is so white it is hard to take pictures of her in the sunlight, though. Maximum glare. I think I will get a second Spectra soon to reroot with glow-in-the-dark hair. Very spooky indeed.
So, on the list of future customs:
- Specra (Glow-In-The-Dark Reroot)
- Georgie (Ghoulia Scary Zombie Repaint)
- Duela Dent (Batman Character)
- Clawdeen (Wood Nymph)
- Enki (Lagoona Lavender Reroot)
Any suggestions? I just love Lilith so much I can't wait to do another. ^_^
Quick family shot. This little table is setup just to my left as I am sitting in my armchair in the lounge. They live here, for now, with some sewing/crochet supplies and a small herd of Sylvanian babies. Hehe.
From left: Lagoona, Lilith, Frankie, Spectra. In front: Enki.
On their way: Ghoulia (Team Spirit) and Shelley (Frankie Gloom Beach)
Stay tuned for more fab photos, or check out my Flickr account.
- Kat
I bought a new Lagoona yesterday, Dawn of the Dance. One of her leg fins was bent and wouldn't fit into the holes properly. I rang cutomer support at Mattel thismorning and they were just wonderful! They immediately agreed to send me a set of fins for her. I then mentioned to them that of her hands had paint defects (one of the webbed parts had paint over it, and on the other hand some indentations from the packaging). So! No worries, in about ten days I will have a new set of fins and hands.
Half an hour later I remembered how my first girl, School's Out Frankie, had a bent heel on one of her shoes. I rang them back again and added it to the list. I was SO happy with their service, very much looking forward to getting the parts. Yay! If you have a problem with any of your dolls I highly reccommend that you give Customer Service a call.
Todays photos are of my second doll, Enki, a Basic Wave One Lagoona. She is named after the Sumerian god of water, mischief, intelligence and crafts, which I think suits her well. I definitely think Lagoona is the prettiest of all the MH dolls. I just adore her webbed fingers and fishy ears.
I had a lot of fun setting up this shot. The one thing that bothers me is that you can't really tell she is underwater in the shot to the right. Well, I suppose she is beautiful either way.
I wanted for her first shoot to be at the beach but I got impatient. I filled my biggest tupperware container with aquarium stones and water, and took these shots in my loungeroom. For more of my photos please be sure to check out my flickr account.
I wasn't planning on renaming my MH girls, but since she is customised and I do have another Ghoulia on the way... Meet Lilith. Her hair is a little thin, but I am extremely happy with her anyway. This first picture was taken before I had thatched and set her parts, and cut her fringe. It also shows the colour of her hair in cold weather. Not sure if you can see the highlights I put in, there aren't many, but they are a pale pink.
Here she wears Bratz and Barbie. The Bratz clothes fit nicely. The Barbie cardigan is way too big but oh well. It was worth trying anyway. Below she wears her stock outfit with her Comic Book Club jewellery. Yup! I received it thismorning but I think I will wait for my Team Spirit Ghoulia to arrive before I debut it. Gotta love that brains print.
After thatching the parts I set them (and flattened the rest of her hair) using the boiling wated method. That is to pour boiled water over her head, followed by cold water. I did it three times. Next to cut the fringe. I put an elastic band around her head as a guide to keep it straight. So here she is! To the right, Lilith, complete. This one shows the colour at a warmer temperature. It can go pure white when heated enough, this was just at the temperature in my house today. She is going to be so versatile for photography. ^_^
I have damaged her make-up throughout the process. The squeezing cracked the paint and the water sort of made the cracked parts peel. Between her glasses and some clever photography angles I think it's not so bad. I might try to touch it up in the future. I have very unsteady hands, so we'll just see how much the flaws bug me. Haha.
Last up, the shoes. As I mentioned in my first post, it was the shoes that really got me into these girls. Ghoulia's Dawn of the Dance shoes are my second favourite so far. Love the spiney/boney motif. They are quite loose without stockings on.
I must include Lagoona next time. The poor dear has had no attention despite joining the family before Ghoulia did.
Hopefully this entry will be helpful for those of you considering trying a knot method reroot. This method is best used on small headed dolls such as Barbie, Bratz, Petite Blythe or, in this case, Monster High. Meet my test subject, Ghoulia Yelps. =)
As you can see I am halfway through here. To start you will need to remove the existing hair. Take her head off by pulling, twisting and squeezing it gently. It may take some time, but be patient and gentle, you don't want to break the peg which connects the head to the body.
Cut her hair off as short as possible, then remove the plugs (and glue) from the inside of her head using needle-nosed pliers. Again, be patient and gentle, so as not to damage the head. There is a lot of glue in there!
Alright, you have a clean, bald head, and are ready to start your reroot. I'm not sure of the best direction to work in, but I have started from the back of the head, working towards the front. I have left the edges (where the plugs are closer together) until last.
Here is what you will need to get to work:
- Saran hair, cut to length. Don't cut it too short - I have cut my skeins into quarters, I wouldn't want it any shorter than that. I seperate a few bunches of saran ahead of time to help me work more quickly.
- A small bowl of water. Wetting the saran makes it easier to work with.
- Needle-nosed pliers
- Scissors
- Needles. I am using beading needles, size 10/13. I have snapped one already and think you should have about 4 or 5 at hand, just in case.
- Thimble (not pictured). If you are comfortable with thimbles it may be wise. I don't like to use them, but my right index finger is getting shredded as the water is making it soft and the tiny needles are very pointy!
Rooting a plug:
- Thread the needle with a few strands of saran (5 to 8 strands, no need to be fussy). Wetting the saran will make it easier to thread.
- Put the needle through a plug hole and out through the neck. Using the pliers will make it easier to pull the needle out. Don't pull the hair all the way through!
- Remove the needle and tie a knot in the saran. Wetting the saran also makes this part easier. (This step it pictured to the left.)
- Now pull the hair back through from outside the head untill the knot hits the inside of the head.
You have rooted one plug! Now continue over and over for several hours. Hahah.
To the right, I made a little video on my phone showing how I complete one plug, demonstrating the method described above.
After all the plugs are filled I will need to spread some craft glue around the inside of her head and allow to dry overnight (standing right-way-up) before putting the head back on the body.
I hope this was helpful. I'll be sure to post pictures when I am finished, along with styling tips.
- Kat
*edit* I will be editing this post soon with additional information. One note to add is that I buy my hair from dollyhair.com . Also that upon starting a new reroot I notice that thermal saran is a lot coarser than regular saran, so I would recommend more than 8 strands per plug. Anyway, please check back for an updated tutorial next week. - Kat
I bought myself a First Wave Lagoona Blue. Yay! She hasn't had any photos yet, which is very slack of me. She had a black/brown spot on her nose and forehead which I removed with a cotton bud dipped in acetone. I really hate these kind of flaws on a NRFB doll. Anyway, I will talk more about her when I have some photos.
Next up is Ghoulia Yelps, Dawn of the Dance edition. She also had marks on her face which I cleaned up with acetone. I was craving her awesome spiney shoes, so my boyfriend surprised me with her. I took this quick shot of her before she had her hair clipped.
She has a small dent on her nose, not sure if that is standard or yet another factory flaw. She also has two small indentations around where her eyebrows begin. My other girls have nothing like this.
Above, Ghoulia pre-haircut. Right, Frankie consoles Ghoulia; "Dismemberment isn't the end of the world!" and Lagoona sulks in the background feeling rather neglected. Nawwww =(
Her hair looks great as it is, but I don't think it's very versatile. Since I have plenty of saran left over from a Blythe reroot I did some months ago, I have decided to give Ghoulia a reroot in Pink-to-White thermal saran. Should serve to add some colour to my currently blue-green shaded family.
In my next post I will give a tutorial on rerooting a Monster High doll, using poor Ghoulia as a test subject. It has been time consuming, but not difficult.
Please vote in the "Favourite Ghoul" poll. I'm interested to see who is most popular. ^_^